 Well first you need to be in MAYA!!!!!!! I don not want you to be the poor idiot trying to bump map in Photoshop, Final Cut Pro, or some other odd program you are using. This is very much a Maya thing so for the love of your project and your sanity, please go to Maya or don't read any more of this blog post as it WON'T HELP YOU!
Now that is out of the way, let's start bump mapping.
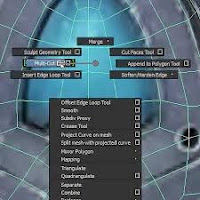 |
| Right click menu |
You should have an object. A cube, a sphere, a plane or whatever. Have an object. Then you should add a texture.
I have a two-button mouse set up in Maya and on my Mac I have right-click activated so when I work in Maya I can right click on my object and a menu will pop up. I can't screenshot this menu so I went to Google to get a picture. This menu allows you to go into vertex mode, edge mode, object mode and more. What we want is the textures on the bottom of this list. Create new.
With that new texture add a file. There is a black and white checkered box to the right of the color box. Click on it and click on add file.
I hope everyone already knows this, but I went everybody to be on the same page before we go onto the more complicated stuff. I don't want anyone getting lost.
IMPORTANT side note: NAME THINGS ALONG THE WAY!!!!!!!! It is very helpful. Don't be me. Please.
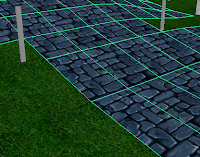
I will be bump mapping a walkway. In the picture you will see that I have my textured plane with blue stones. You will also see grass(that has been bump mapped. Doesn't it look AWESOME?!?!?!?). So I've clicked on my object and I want to have the attribute editor open and get to your texture.
If you just textured your object, you're already where you need to be.
This is what you should be seeing on the right hand of you're screen. Get to this screen.
Those big red arrows is what we're going to be working with. But before we can add anything in to the beautiful bump map thingy. We need a black and white image of your texture. Or I need a black and white photo of my blue walkway.
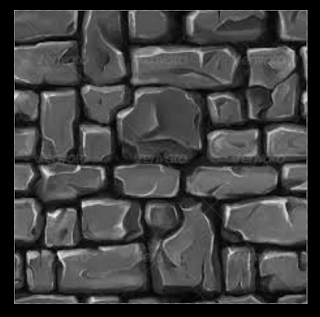 |
| Bump Map Source Image |
Once you're done in Photoshop, save your file as a j-peg. Then put the image in your source image folder in your Maya Project Folder. I sincerely hope you have good file management for the sake of your sanity.
I have my Bump Map source image up just so you have an idea of what it should like it. But don't freak out if it doesn't. I'll be making more Bump Map source images, and I'll add them when I finish making TTP, because I know that there are so many different ways Bump Maps can be used so there so many ways your source image can look.
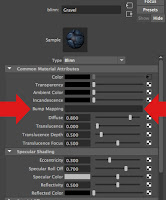
Now back to this screen in Maya! Remember those red arrows? Well they're important right now. Right under the arrow on the right hand side of that picture is a black and white square. CLICK IT!
There will be a menu that pops up. Press the FILE button. You add a file in the bump mapping thing like you would for a texture. If you can make a texture, you can create a bump map.
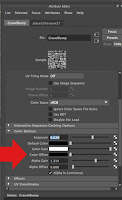
Once you add a file to the bump map thing, a new menu like thing comes up into the attribute editor. This menu allows you to edit a ton of stuff to your bump map image.
If you are going to edit anything in this menu I would suggest only messing with the color balance. The color balance is open in my image and it is by the single red arrow. To the left of this menu in Maya, you should still be able to see your object so when you make changes to anything in this menu please look at your object to see what you're doing. It's really important that you like what you're doing to your object.
This may be all you need to do. If you are pleased with how you're textured bumped, you don't need to carry on, but if you aren't pleased I have more!!!!
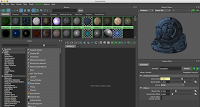 Now if you are unhappy with how your little bump depth there is on your texture, there is hope!!!! I have had the same issue with my gravel. What you do is go the window tab go down to rendering editors and click on HYPERSHADE!!!! The initial pop up screen will show you materials. You will see my material for TTP up. Please choose the texture you are currently bumping. Just to make sure you know what you're doing.
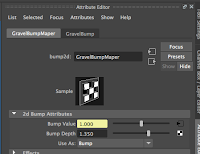 Now once you click on the right one, you can mess with the bump depth in the Hypershader or the Attribute editor. They both do the same thing.
That's it! You're done!

No comments:
Post a Comment